
From blueprints to your first pour — everything you need to know before swinging a hammer.
Imagine walking downstairs on a Friday night, dimming the lights, sliding behind your own bar, and mixing a cocktail exactly the way you like it — in your own home. That dream is closer than you think, and a well-planned diy basement bar is one of the highest-return home improvement projects you can take on. Whether you have a sprawling unfinished basement or just a modest corner to work with, this guide will walk you through every step of the process.
Millions of homeowners across the country are turning unused basement square footage into stunning entertainment spaces. According to a 2023 National Association of Home Builders report, finished basement projects — particularly home bar builds — can return anywhere from 70% to 86% of their investment at resale. That means you’re not just building a place to entertain; you’re building equity.
But where do most DIYers go wrong? They dive in without a plan. They underestimate the importance of layout, plumbing rough-ins, and proper cabinet selection. They spend money in the wrong places and cut corners where they shouldn’t. This guide fixes all of that. We’ll cover how to build a basement bar from scratch — including framing, cabinet selection, countertops, lighting, plumbing, and finishing touches — so you avoid costly mistakes and end up with a bar you’re genuinely proud of.
Whether you want a sleek diy built in bar, a rustic homemade basement bar with reclaimed wood, or a fully stocked wet bar with a sink and mini-fridge, this guide has you covered. Let’s build something great.
Planning Your DIY Basement Bar: Blueprints, Budget & Layout
Every great bar starts on paper. Before you buy a single board or cabinet, you need a clear basement bar blueprint — even a rough sketch on graph paper counts. Think about how many people you typically entertain, where the primary seating will be, and whether you want a straight bar, an L-shaped bar, or a basement bar with island configuration.
Choosing the Right Layout for Your Space
The most common layouts for a diy basement bar are the straight wall bar, the L-shape, and the U-shape. A straight basement wall bar works best in narrow spaces and requires the least material. An L-shape adds a natural corner for a back bar or shelving display and is the most popular layout for diy basement bars that double as entertainment hubs. The U-shape, or basement bar with island, creates a fully immersive bar experience but requires at least 200–250 square feet of dedicated space.
When planning your layout, always account for the “working triangle” — the space between the sink, refrigerator, and storage. A well-designed build a bar in basement project keeps these three elements within easy reach. Most professional bar designs keep this triangle under 12 feet total.
Setting a Realistic Budget for Your Basement Bar Build
One of the biggest stressors in any basement bar build is budget creep. Here’s a realistic cost breakdown for a mid-range DIY project:
| Component | Budget Range | Notes |
|---|---|---|
| Lumber & Framing | $150 – $400 | 2×4s, plywood substructure |
| DIY Bar Cabinets | $300 – $1,200 | Stock, semi-custom, or custom |
| Countertops | $200 – $800 | Butcher block, laminate, or tile |
| Plumbing (sink) | $200 – $600 | More if adding new drain line |
| Electrical / Lighting | $150 – $500 | Outlets, under-cabinet LED strips |
| Drywall & Paint | $100 – $300 | Moisture-resistant drywall recommended |
| Bar Stools & Decor | $150 – $600 | Bar-height stools, mirrors, signage |
| Total (DIY) | $1,250 – $4,400 | Varies by size and finish level |
Hiring a contractor for the same project typically runs $8,000–$20,000. The savings from doing it yourself are significant, and the project is entirely achievable for a determined DIYer with basic carpentry skills
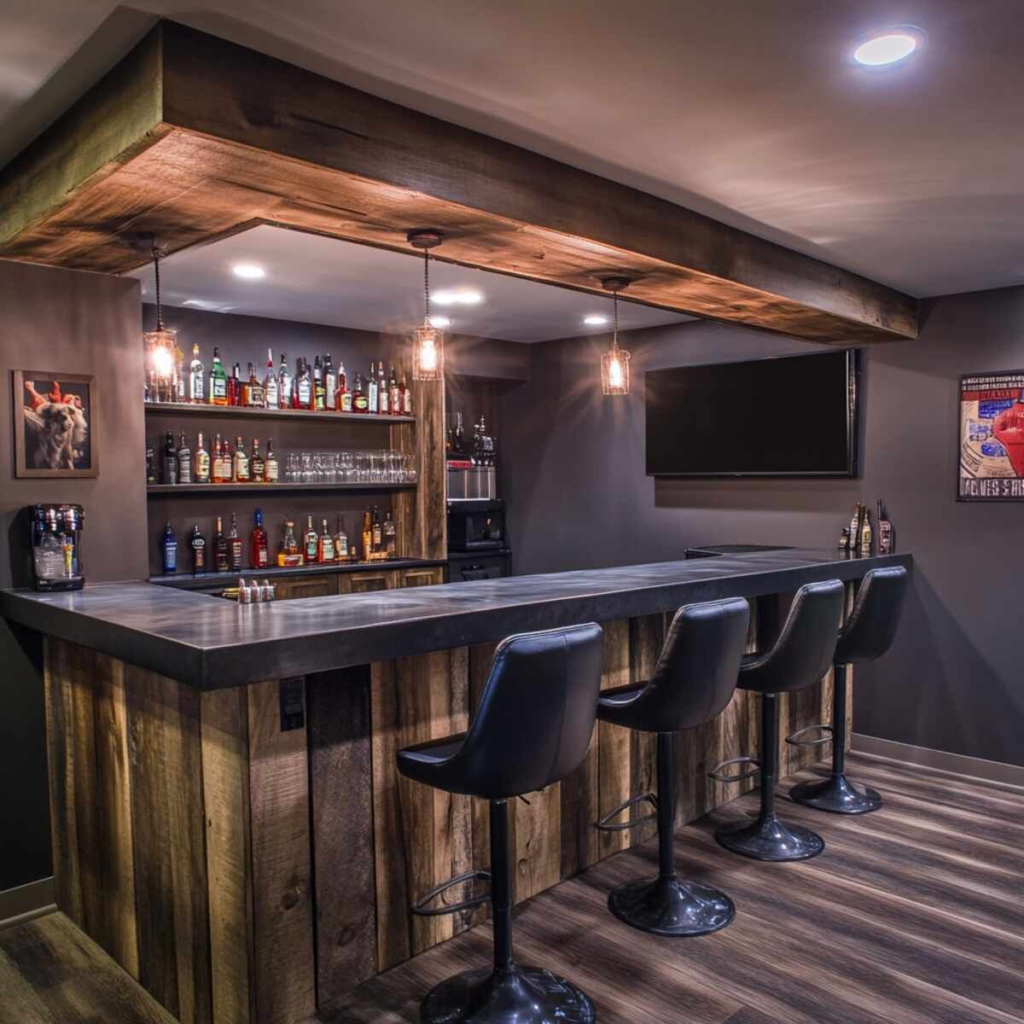
A well-planned basement bar transforms underutilized square footage into a stunning entertainment space.
How to Build a Basement Bar: Framing and Structural Foundation
Once your layout is finalized, it’s time to get physical. Building a basement bar starts with framing — the structural skeleton that will support your bar top, back wall, and any upper cabinetry. This step is non-negotiable; skipping a proper frame leads to wobbly bars, uneven countertops, and cabinets that rack over time.
Framing the Bar Structure Step by Step
Start by snapping a chalk line on the floor to mark your bar’s footprint. A standard bar is 42 inches tall (bar height) for standing guests, or you can go with 36 inches for a seated counter height. Most diy basement bar plans use a two-wall system: a knee wall on the guest-facing side and a full-height back wall on the bartender side.
Use pressure-treated 2×4 lumber for the bottom plate where it contacts concrete — this prevents moisture wicking and rot. Anchor the bottom plate to the concrete slab with a powder-actuated nailer or concrete screws (Tapcons work great). Frame your knee wall with 2×4 studs at 16 inches on center, just like a standard interior wall. Top the knee wall with a 2×6 or 2×8 top plate to provide a wide nailing surface for your bar top overhang.
Rough-In Plumbing and Electrical Before Closing Walls
Here’s the mistake that stings: people frame and drywall before running their plumbing and electrical. If you want a wet bar with a sink — and most people do — now is the time to rough in a cold water supply line, a hot water line, and a drain. Check your local building codes; most jurisdictions require a permit for new plumbing work, and inspections happen before drywall.
For electrical, rough in a dedicated 20-amp circuit for the bar area (refrigerator draws significant current), add GFCI-protected outlets along the back wall, and pre-wire for under-cabinet lighting strips. Doing this now saves you from tearing open walls later. A diy bar for basement with properly planned utilities will serve you for decades without headaches.
DIY Bar Cabinets: Your Most Important Decision
If there’s one area where your bar will make or break its visual impact, it’s the cabinetry. DIY bar cabinets define the entire aesthetic of your space — and they’re also one of the most flexible parts of the build. You have three main options: stock kitchen cabinets repurposed for bar use, semi-custom cabinets from a box store, or fully custom diy built in bar cabinet solutions you build from scratch.
Using Kitchen Cabinets for Your Bar — The Smart Shortcut
One of the most popular and cost-effective strategies in any building a bar in basement project is repurposing standard kitchen cabinets. This approach is brilliant because kitchen cabinetry is manufactured to extremely tight tolerances, comes in a vast range of sizes, and is widely available at home improvement stores for a fraction of custom pricing.
For the lower bar structure, use bar base cabinets — standard 34.5-inch-tall base cabinets are perfect as bar height base cabinets when combined with a thick countertop that brings the total to 36–42 inches. Under the bar top, you can install under bar cabinets for wine storage, a mini-fridge cutout, or pull-out trash bins. On the back wall, upper bar cabinets or open shelving creates the classic back-bar display area for bottles, glassware, and decorative items.
Pro Tip: Look for unfinished bar cabinets at home improvement stores — they’re significantly cheaper than pre-finished options and give you full control over stain color and finish. Many homeowners successfully use IKEA SEKTION or Home Depot Hampton Bay cabinets as base cabinets for bar builds with outstanding results.
How to Build a Bar Cabinet from Scratch
If you want something truly custom — a specific size, a unique style, or built-in features like a wine rack or glass-door display — learning how to build a bar cabinet from scratch is a rewarding option. You’ll need a table saw, pocket screw jig (like a Kreg Jig), and basic woodworking skills. Face-frame construction using 3/4-inch plywood for the carcass and hardwood poplar or oak for the face frame produces professional results that rival store-bought cabinetry.
For a do it yourself diy bar cabinet build, the basic steps are: cut your plywood panels to size, assemble the box with pocket screws, add a face frame, hang the doors on concealed Euro hinges, and apply your finish. A standard bar base cabinet measures 24 inches deep, 18–36 inches wide, and 34.5 inches tall. Build several modules that stack side by side to fill your bar run.
Bar Height Cabinets vs. Standard Cabinets
Standard kitchen base cabinets sit at 34.5 inches without a countertop. Add a 1.5-inch countertop and you’re at 36 inches — perfect for a seated bar counter. To reach a standing bar height of 42 inches, either build a riser platform under your cabinets, select bar height cabinets (available from some manufacturers), or add a thick bar top overhang supported by the knee wall. Understanding the difference between bar height cabinet base options and standard kitchen sizing is one of the most commonly Googled questions in any how to build a bar with cabinets project — and for good reason.
Framing the cabinet structure correctly ensures a level, sturdy bar that will last for years.
Building a Bar in Basement: Countertops, Bar Tops, and Surfaces
The bar top is where function and style collide. It needs to handle spills, resist staining, endure the weight of drinks and elbows, and still look great after years of use. When you’re building a bar in the basement, you have more countertop choices than ever before — each with distinct pros, cons, and price points.
Best Countertop Materials for a DIY Bar
Butcher block is the most popular choice for a diy bar project. It’s warm, inviting, relatively affordable ($40–$80 per linear foot), and can be cut with basic woodworking tools. Seal it with multiple coats of polyurethane or bar-top epoxy for a water-resistant finish that can handle the rigors of a working bar. Sand and refinish every few years to keep it looking pristine.
Tile is extremely durable, water-proof, and allows for creative patterns. The downside is grout lines, which can stain and are harder to keep clean. Subway tile on a cement board substrate is a timeless choice for a diy bar counter build. Laminate (think Formica or Wilsonart) is the most budget-friendly option — modern laminate patterns convincingly mimic granite, marble, and concrete. For a bar top overhang, a post-form laminate countertop with a built-in bullnose edge is a clean, professional-looking solution.
Epoxy bar top is having a major moment in the DIY community. Products like FamoWood or StoneCote allow you to embed coins, bottle caps, photos, or custom graphics under a self-leveling clear coat that produces a glass-smooth, ultra-durable surface. It’s a labor-intensive process, but the results are genuinely stunning and unique.
📊 DIY Basement Bar: By the Numbers
70–86%Average ROI at home resale for a finished basement bar (NAHB, 2023)
$1,500Average cost of a simple DIY basement bar build (materials only)
42″Standard standing bar height — the most common in home bars
3–5Weekend days for a competent DIYer to frame, install cabinets & top
24″Standard depth for bar base cabinets — same as kitchen base cabinets
Key stats every DIYer should know before starting their basement bar build.
DIY Bar for Basement: Back Bar, Wall Shelving, and Display Areas
The back bar — the wall behind the bartender — is where your bar’s personality lives. A diy wall bar or built in bar wall setup typically includes a combination of open shelving for liquor bottles and glassware, closed bar wall cabinets for storage, and accent lighting to create atmosphere. Getting this right transforms a plain basement bar build into something that genuinely looks like it belongs in a high-end restaurant or hotel lounge.
How to Build a Back Bar with Wall Cabinets
A classic how to build a back bar approach uses standard wall bar cabinets — essentially upper kitchen cabinets — mounted at the right height behind the bar counter. Mount the bottom of your upper cabinets at approximately 18 inches above the countertop surface, leaving space for a backsplash, under-cabinet lighting, and easy access to the work surface. This is the same clearance used in kitchen design, and it works perfectly for a bar with cabinets under and above.
For open display shelving between the counter and upper cabinets, use floating shelves made from 3/4-inch oak or maple plywood with an applied edge banding. Bracket them with heavy-duty hidden shelf brackets rated for at least 50 lbs per shelf — glassware and full bottles are heavier than they look. A built in wall bar with open glass display above and closed cabinets for a bar below is functionally ideal and visually spectacular.
Lighting: The Element Most DIYers Forget
Lighting is the single most underrated element in a basement bar diy project. Your basement doesn’t get natural light, which means every lumen has to come from your design. A layered lighting scheme with three tiers is the professional approach: ambient overhead lighting (recessed LED cans or a dramatic pendant), task lighting (under-cabinet LED strips above the work surface), and accent lighting (LED strips inside glass-front cabinet boxes or below the bar overhang for a floating effect).
LED strip lights in the 2700K–3000K color temperature range create the warm, golden glow associated with great bars. They’re inexpensive, easy to install with adhesive backing, and can be run on a smart dimmer switch for full atmosphere control. This single upgrade costs under $50 but dramatically elevates the feel of your homemade basement bar.
How to Build a Bar in Your Basement: Wet Bar Plumbing Guide
Adding a sink to your diy basement bar elevates it from a dry bar to a genuine wet bar — a huge practical upgrade. Building a bar cabinet with a sink cutout is straightforward; the plumbing is where most DIYers hesitate. But with a little patience and the right guidance, rough-in plumbing for a bar sink is entirely achievable for the average homeowner.
Plumbing Basics for a Basement Wet Bar
The biggest challenge in basement plumbing is the drain. Unlike upper floors where gravity does the work effortlessly, a basement drain requires you to either tap into an existing nearby drain line or install an under-sink pump system (sometimes called an “up-flush” or saniflo system) if your drain line is above the level of your sink. Saniflo systems are more expensive ($500–$900) but require no jackhammering and can be installed by a determined DIYer in a single afternoon.
For the water supply, running 1/2-inch PEX tubing from your nearest shutoff to the bar location is the easiest approach. PEX is flexible, freeze-resistant, and requires no soldering — you simply crimp fittings with an inexpensive crimp tool. Run both hot and cold supply lines, install a shutoff valve at the bar location, and connect to your bar sink faucet. Most local codes require this work to be inspected, so pull a permit even if it feels like overkill.
Simple DIY Basement Bar Ideas for Every Style and Budget
Not every diy bar basement project needs to be a full custom wet bar. Some of the most impressive basement bars are also among the simplest. Here are some of the best approaches based on your budget, skill level, and available space.
The Simple Dry Bar — Best for Beginners
A diy dry bar has no plumbing — just a counter, storage, and display. This is the easiest entry point into building a bar and can be completed in a single weekend. Start with a pair of bar base cabinets, add a butcher block countertop, mount a few floating shelves above for bottle display, and finish with a coat of paint and some task lighting. Total cost? Often under $600. A simple diy basement bar like this can be refined over time as your budget and ambition grow.
The Built-In Wall Bar — Maximum Impact, Minimal Footprint
A bar built into wall design is perfect for narrow basements or rooms where floor space is at a premium. By recessing the bar into a wall niche or building a diy bar wall unit that spans floor to ceiling, you create a dramatic focal point without losing walkable square footage. This approach uses built in bar wall cabinetry configured as a combination of base cabinets, open shelving, and upper display cabinets — essentially a floor-to-ceiling entertainment unit anchored by the bar counter.
The DIY Bar Hutch — Old School Charm
A diy bar hutch is a freestanding bar unit that combines a lower cabinet base with an upper display hutch. This style requires no permanent construction and is ideal for renters or homeowners who want flexibility. You can buy an unfinished bar cabinet hutch from many home furnishing stores and customize it with paint, new hardware, and interior LED lighting to create something that looks entirely custom. A diy home bar cabinet in hutch style is also one of the easiest projects to tackle with basic tools — primarily a drill, level, and paintbrush.
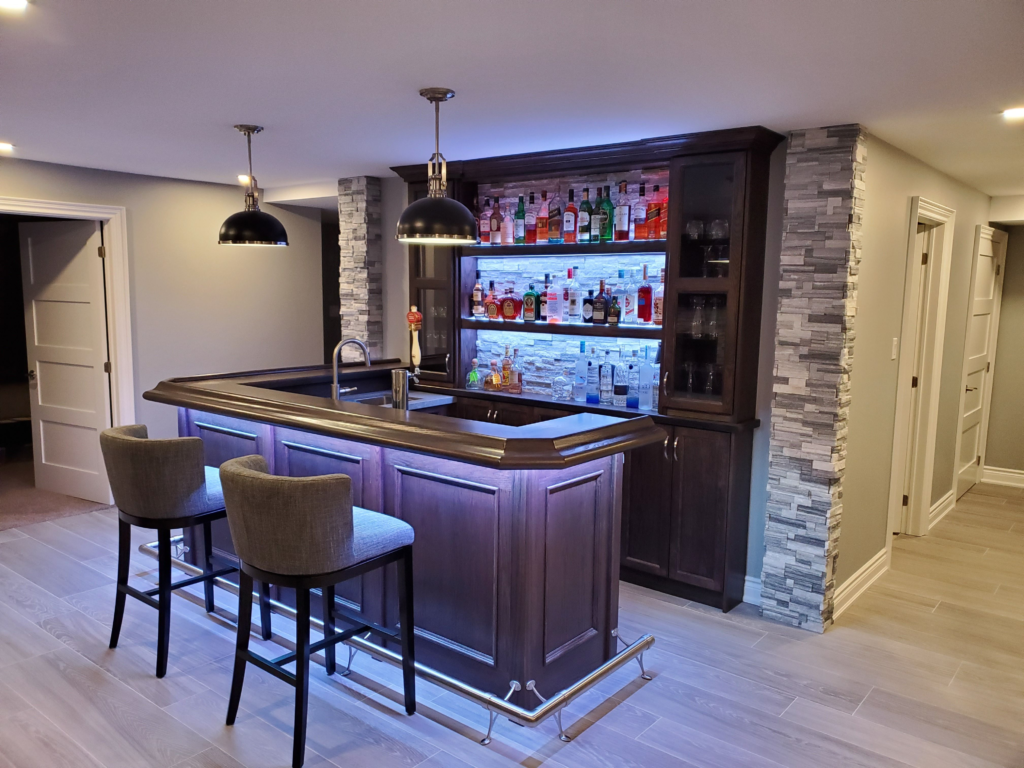
The L-Shaped Bar with Island — The Ultimate Entertainment Setup
For homeowners with space to spare, the L-shaped basement bar with island is the pinnacle of the diy basement bar experience. The island creates a natural gathering point, adds prep and storage space, and allows bartending from multiple sides. Build the island using the same bar base cabinets approach as the main bar run, connect the two countertops at the corner with a seamless miter joint or a waterfall edge, and add pendant lights over the island to define the space visually.
Finishing Touches: What Separates a Good Bar from a Great One
You’ve framed, plumbed, wired, cabineted, and countertoped your way through a complete basement bar build. Now comes the part that most diy bar designs underestimate: the finish details that make your bar feel like a professional installation rather than a home project.
Backsplash, Trim, and Paint
The backsplash between your countertop and upper cabinets is a small area with outsized visual impact. Subway tile, penny rounds, or even a large-format porcelain slab all work beautifully. Keep grout lines tight and use an epoxy grout for maximum stain resistance. For trim, use 3/4-inch casing around all cabinet faces, add a crown molding run along the top of your upper cabinets, and add base shoe molding where the toe kick meets the floor. These details take less than half a day to complete and make your how to build a bar project look genuinely custom.
Bar Rail, Foot Rail, and Hardware
A brass or stainless steel bar rail mounted on top of the bar knee wall gives guests a place to rest their arms and instantly communicates “this is a real bar.” A foot rail at the base of the knee wall (typically at 8–12 inches off the floor) adds comfort for seated guests and is the detail that most impresses visitors. Both rails are available pre-bent to standard bar lengths and mount with simple flanges and screws.
For cabinet hardware, choose pulls and knobs that match your bar’s overall aesthetic — oil-rubbed bronze for a rustic or industrial look, brushed nickel for modern or transitional, polished brass for a retro speakeasy vibe. Consistency in hardware finish across every cabinet door and drawer ties the entire build a bar project together visually.
Flooring Under and Around Your Bar
Basement flooring for a bar area should be impervious to moisture and easy to clean. Luxury vinyl plank (LVP) flooring is the top choice for most basement bar diy projects — it’s waterproof, comfortable underfoot, easy to install as a floating floor over concrete, and available in convincing wood and stone finishes. Behind the bar, consider a commercial rubber mat (the kind with the drainage holes) — it’s comfortable for long standing sessions, protects your floor, and catches drips before they spread.
Frequently Asked Questions About Building a DIY Basement Bar
How much does it cost to build a DIY basement bar?
A basic diy basement bar with stock cabinets, a laminate countertop, and no plumbing typically costs $800–$2,000 in materials. Adding a wet bar with a sink and refrigerator brings costs to $2,000–$4,500. Full custom builds with stone countertops, custom diy bar cabinets, and premium finishes can exceed $6,000 — still far less than hiring a contractor for the same work.
Do I need a permit to build a bar in my basement?
It depends on your municipality. In most jurisdictions, a simple build a basement bar that involves only carpentry and no new plumbing or electrical does not require a permit. However, if you’re adding a new sink (requiring a plumbing permit), new electrical circuits (requiring an electrical permit), or significantly altering the basement layout, permits are typically required. Always check with your local building department before starting.
Can I use kitchen cabinets to build a bar in the basement?
Absolutely — and this is one of the best strategies in any building a bar in basement project. Standard kitchen base cabinets are the same depth (24 inches) and similar in height to bar base cabinets. They’re widely available, well-made, and come in dozens of door styles and finishes. Using kitchen cabinets bar configurations saves significant money compared to specialty bar cabinetry.
What is the standard height for a basement bar?
The two most common bar heights are 36 inches (seated counter height, same as a kitchen counter) and 42 inches (standing bar height). For a bar height cabinet base setup, most builders use standard 34.5-inch base cabinets plus a countertop to reach 36 inches, then add a raised knee wall structure to achieve 42 inches for the bar top. Bar height cabinets specifically designed for bars are available from specialty manufacturers.
How long does it take to build a DIY basement bar?
A straightforward diy bar in basement project — framing, cabinet installation, countertop, and basic finishing — typically takes 3–5 full days of work spread over 2–3 weekends for a competent DIYer. More complex projects involving plumbing, electrical, tiling, and custom diy bar cabinets can take 4–6 weekends. The most important factor is thorough planning before starting construction.
What’s the best wood to use for a DIY bar cabinet?
For a build a bar cabinet DIY project, 3/4-inch birch plywood is the go-to material for cabinet boxes — it’s stable, strong, and takes paint beautifully. For face frames, oak, maple, or poplar are the most popular choices. Oak and maple are harder and more durable; poplar is cheaper and paints extremely well. If building a homemade bar cabinet with a natural wood finish, oak provides the most traditional, upscale look.
Can I add a sink to my DIY basement bar?
Yes, and it’s highly recommended if your basement layout allows it. The key challenge is the drain, which in a basement typically runs close to or below the slab level. If cutting the concrete isn’t an option, an above-floor macerating pump system (like a Saniflo) allows you to add a sink without any concrete work. Running water supply via flexible PEX tubing is straightforward and doesn’t require soldering skills.
What are the best DIY basement bar design styles?
The most popular diy bar designs include the classic dark-wood traditional bar (stained cabinets, pendant lights, brass hardware), the modern industrial bar (concrete countertops, black pipe shelving, exposed brick), the rustic farmhouse bar (shiplap back wall, butcher block top, open shelves), and the sleek contemporary bar (white or two-tone cabinets, quartz countertop, under-cabinet lighting). The best style is the one that matches your existing basement décor and your personal taste.
Conclusion: Your Basement Bar Is Closer Than You Think
A well-executed diy basement bar is one of the most satisfying home improvement projects you can tackle. It adds genuine value to your home, creates an entertainment space your family and friends will love, and gives you a real sense of accomplishment every time you walk downstairs. The key is planning — get your layout right, choose your cabinets thoughtfully, run your utilities before closing walls, and don’t skip the finish details that transform a functional structure into a polished, impressive bar.
Whether you’re building a bar in basement from scratch with custom framing and cabinetry, repurposing kitchen cabinets with bar modifications, or tackling a simple diy basement bar over a single long weekend, the steps outlined in this guide give you everything you need to succeed. Start with a solid plan, shop smart on materials, take your time with the finish work, and you’ll end up with a build a bar result you’ll be pouring drinks at for years to come.
Now get out there — your basement bar isn’t going to build itself.