
Introduction
There is something magnetic about a wall that looks like it has been standing for centuries — slightly worn, beautifully uneven, quietly telling a story. That’s exactly the feeling that faux limewash paint brings into a modern home, and it’s no surprise that homeowners everywhere are falling head over heels for the look. Whether you’ve seen it on a Mediterranean villa, a trendy boutique hotel, or just scrolling through design Instagram at midnight, the appeal is instant and undeniable.
The good news? You do not need to hire a specialist plasterer or spend thousands of dollars to get there. With the right knowledge of the limewash technique, a weekend of your time, and a little patience, you can create breathtaking limewash walls inside your own home. This guide will walk you through every step — from understanding what limewash paint actually is, to mixing your own recipe, choosing the right colors, and troubleshooting the most common mistakes people make along the way.
Whether you are a seasoned DIYer or picking up a brush for the very first time, this article gives you everything you need to achieve a professional-grade limewash finish — no expensive contractor required.
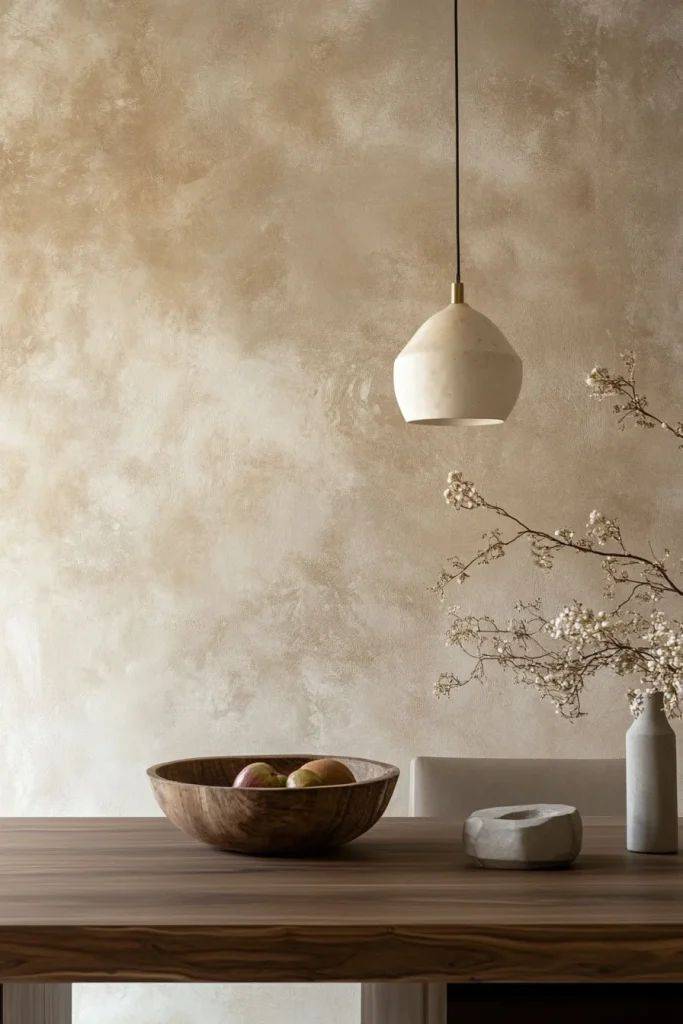
The organic, layered texture of limewash paint gives walls a depth that flat paint simply cannot replicate — each brushstroke tells part of the story.
What Is Limewash Paint — and Why Is Everyone Obsessed With It?
Before we dive into tools and technique, it helps to understand what you’re actually working with. Traditional lime wash is made from limestone that has been burned, slaked (mixed with water), and aged into a creamy, mineral-rich paste. When brushed onto a wall in thin, translucent layers, it creates a soft, hazy depth that oil and latex paints simply cannot replicate. The finish absorbs into the surface rather than sitting on top of it — which is exactly why authentic lime washed walls have that unmistakably aged, organic character.
Modern faux limewash, however, works a little differently. It uses standard latex or chalk-based paint diluted and layered in a specific way to mimic the authentic limewash effect. The result is remarkably similar to the real thing but without the complexity or the caustic materials involved in working with raw lime. This is why the DIY limewash approach has exploded in popularity — it is accessible, affordable, and genuinely stunning when done well.
Limewash paint is not just a trend. It is a centuries-old finish rediscovered by modern interiors — and the results speak for themselves.
Faux Limewash vs. Real Limewash: What Is the Actual Difference?
Authentic lime wash paint uses hydrated lime (calcium hydroxide) as its base. It is breathable, naturally antibacterial, and absorbs CO₂ as it cures — actually hardening like stone over time. However, it can be tricky to work with, requires proper surface preparation (especially on drywall), and can be caustic to the skin and eyes. Faux lime wash, on the other hand, uses everyday paint products diluted and applied in strategic layers to produce an almost identical visual result. For most homeowners doing a DIY limewash project, the faux route is the smarter, safer, and more forgiving choice.
Real vs. Faux Limewash: At a Glance
| 🧱 Base Material Real: Hydrated lime Faux: Latex/chalk paint | 🛠️ DIY Friendliness Real: Moderate-hard Faux: Beginner-friendly | 💰 Cost Real: Higher Faux: Budget-friendly |
| 🎨 Color Options Real: Limited naturals Faux: Any tint possible | ⏱️ Cure Time Real: Weeks Faux: 24–48 hrs standard | ✨ Visual Result Real: Authentic patina Faux: Near-identical look |
How to Make Limewash Paint at Home (The DIY Recipe)
One of the most common questions people ask is: how do I make limewash paint myself? The great news is that it requires very few materials, most of which you probably already have or can pick up at any hardware store. Here is the trusted diy limewash paint recipe that works on both drywall and previously painted surfaces.
What You Will Need
- 1 part flat white latex paint (or chalk paint for extra texture)
- 1 part water (adjust for consistency — thicker for more coverage, thinner for translucency)
- Optional: universal tint or powdered pigment in your desired color
- A large chip brush or natural bristle brush (avoid foam rollers)
- Masking tape, drop cloths, and a damp rag for blending
Mix your paint and water thoroughly until it reaches the consistency of heavy cream. If you want a green limewash paint effect, add a sage or olive tint to this base. For brown limewash tones, mix in raw umber or burnt sienna. You can also purchase pre-made limewash paint products like Portola Paints’ Lime Wash line if you prefer a ready-to-go formula — though knowing how to make lime wash from scratch saves money and gives you far more control over the final look.
| 💡 PRO TIP Always do a test patch on a hidden section of your wall before committing to the full room. The limewash paint texture can look dramatically different once it dries, so testing lets you adjust the water ratio before you go all in. |
How to Limewash Walls: A Step-by-Step Walkthrough
Now we get to the heart of it. Knowing how to limewash walls properly makes the difference between a result that looks effortlessly artisanal and one that just looks messy. Follow these steps carefully and you will be amazed at what you can achieve.
- Prepare your surface. Clean the wall of dust and grease. Fill any holes. If you are working on fresh drywall, prime it first with a flat white primer. If working over existing paint, make sure it is clean, dry, and not flaking.
- Apply a base coat. Paint the wall in a flat white (or your chosen base color). This is your foundation layer. Let it dry completely — at least 2–4 hours.
- Mix your limewash. Use your pre-mixed diy limewash formula (paint + water). Have a spray bottle filled with plain water nearby.
- Apply in a cross-hatch motion. Dip your brush loosely and apply the limewash in random X-shaped strokes, not in uniform lines. Work in 2×2-foot sections. The irregularity is the whole point.
- Wipe and blend while wet. This is the signature lime wash paint technique: use a damp rag or slightly wet brush to soften edges, lift some paint away, and create variation. Work quickly — the blend window closes in about 3–5 minutes.
- Let dry, then evaluate. The color will dry 30–50% lighter than it looks wet. Once dry, assess the depth. Most beautiful limewash walls require two to three layers for that rich, moody depth.
- Repeat with additional layers. Subsequent layers of limewash build the depth and variation that make this technique so compelling. Each pass should be slightly different in direction and pressure.
The Secret to That Perfect Limewash Paint Effect
The thing that separates a stunning limewash paint effect from a sloppy mess is control over your wet edge and blending time. If you allow one area to dry fully before moving to an adjacent section, you will get hard, obvious lines — something that kills the organic quality of the limewash finish.
A key trick professionals use is to lightly mist the wall with water before applying each layer. This slows the drying time and gives you a larger blend window, particularly useful in warm, dry climates where limewashing walls can feel like a race against the clock. You can also use a sea sponge instead of a rag for the blending step — the irregular sponge surface creates even more natural-looking variation in the limewash paint texture.
Layering is everything — two or three passes of a diluted limewash mix builds extraordinary depth and character on any wall surface.
Limewash Paint Colors: Choosing the Right Palette for Your Space
Color choice is where the personality of your project really comes alive. The beauty of using faux limewash is that you can tint your mixture to virtually any color — though certain palettes have proven particularly stunning in interior spaces.
Warm Neutrals and Whites
The classic choice. A creamy white or warm greige base creates the timeless, Tuscan farmhouse lime wash look that never goes out of style. This palette works in virtually every room and makes spaces feel both larger and warmer. If you’ve been wondering what does limewash look like in the most traditional sense — this is it.
LIMEWASH COLOR SWATCHES
| Classic Linen | Warm Parchment | Brown Limewash | Sage Green | Deep Umber |
Green Limewash Paint: The Trend Everyone Is Talking About
If you have been paying attention to interior design over the last two years, you have seen the rise of green limewash in a big way. From a muted sage green limewash bedroom to a deep forest-toned green limewash bathroom, the combination of an organic technique with earthy green tones feels incredibly grounded and fresh. Lime wash green pairs beautifully with natural wood furniture, linen textiles, and rattan accents. Even a single green limewash wall used as an accent can completely anchor a room.
To achieve light green limewash, blend a small amount of sage-green universal tint into your white latex base. Start with less pigment than you think you need — the layering process will naturally deepen and intensify the tone. For a green lime wash wall with serious drama, try adding a tiny touch of grey or blue-grey to push it toward a moody, mineral tone.
Brown Limewash: Depth, Warmth, and Old World Drama
Brown limewash paint is having a major moment in dining rooms, living rooms, and feature walls. Adding raw umber or burnt sienna to your base creates that deep, aged plaster look reminiscent of ancient Italian interiors. A brown limewash wall pairs brilliantly with terracotta tiles, dark walnut furniture, and warm brass hardware.
Limewash on Drywall, Brick, and Painted Surfaces
One of the most common concerns for first-time DIYers is whether limewash on drywall actually works. The answer is yes — but with a caveat. Raw, unpainted drywall is too porous and absorbent for direct lime wash application. Always apply a flat white primer or base coat first to regulate the surface porosity. Once that base is in place, your drywall is ready to receive the limewash mixture beautifully.
For those asking about limewash over paint — this works well on previously painted surfaces as long as the existing paint is flat or eggshell (not semi-gloss or gloss). Glossy finishes repel the watery limewash mixture. If your walls are currently glossy, lightly sand them with 120-grit sandpaper to dull the sheen before beginning. Painting over limewash in the future is equally simple — just prime before applying a new coat of standard wall paint.
| ⚠️ COMMON MISTAKE TO AVOID Applying limewash too thickly in a single pass is the most common beginner error. Thin, translucent layers build depth far more effectively than heavy, opaque coats — and they dry far more evenly too. |
Can You Tint Limewash — And How?
Absolutely. Limewash paint accepts tint beautifully, whether you use universal tint concentrates, powdered pigments, or pre-tinted chalk paint as your base. The key is to add color gradually, testing your mixture on a scrap piece of board as you go. Because limewash layers dry considerably lighter than they appear wet, your test patches must dry fully before you judge the final color. This is the most important secret to knowing how to limewash with consistent, predictable results.
Achieving the Limewash Effect with Normal Paint
Here is a question that comes up constantly: can you get a limewash effect with normal paint you already have at home? Yes — and this is genuinely one of the most budget-friendly home improvement hacks around. Any standard flat or matte latex paint will work as a base for your limewash paint diy project. The transformation happens not in the product you buy, but in the technique you apply.
The Limewash Glaze Method
For an extra level of depth, some experienced DIYers mix their diluted paint with a small amount of clear latex glazing liquid. A limewash glaze mixture extends the drying time significantly, giving you more time to blend, wipe, and manipulate the paint before it sets. This approach is particularly valuable for large wall surfaces where keeping a wet edge across the room can be challenging.
Using Chalk Paint for a Limewash Paint DIY Effect
Chalk paint’s naturally matte, porous surface behaves remarkably like authentic lime-based finishes. When you dilute chalk paint with water and apply it using the lime wash painting technique, the result is often more convincingly textured than regular latex. For chalk paint, simply dilute it at a 1:1 ratio and follow the same cross-hatch technique. If you’re exploring how to use chalk paint for a limewash look, this is the single most effective approach.
Green limewash walls paired with natural wood tones and linen textiles create a grounded, biophilic atmosphere that feels both modern and timeless.
Room-by-Room Limewash Paint Ideas
Living Room: Drama Without Overwhelm
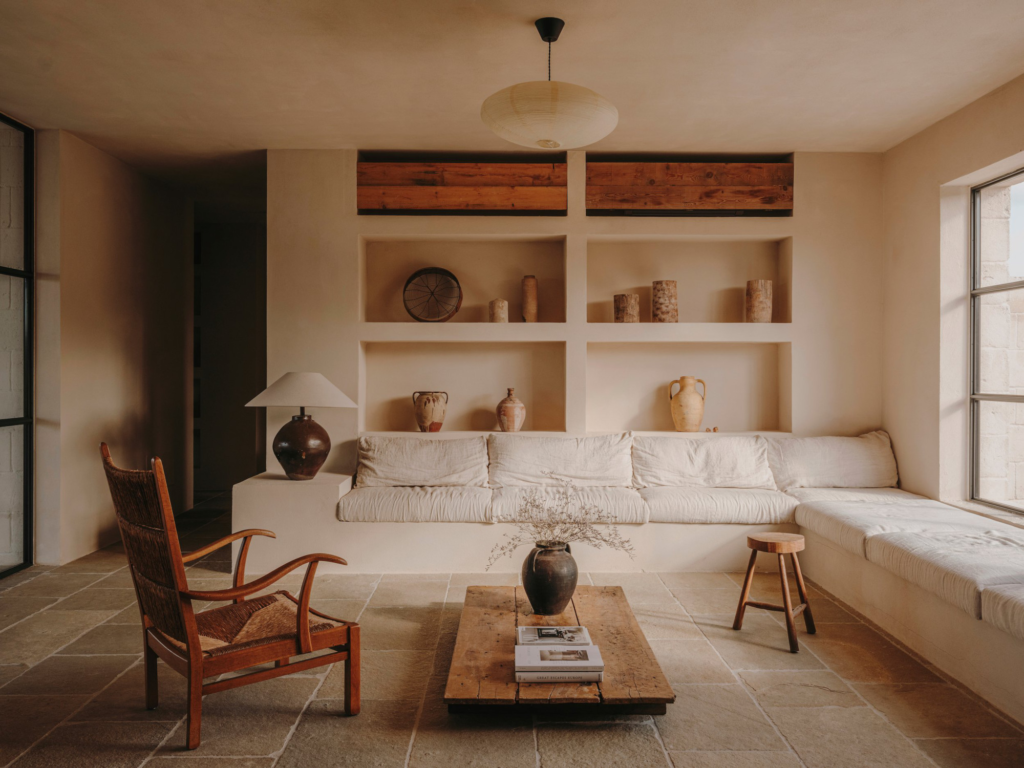
Limewash paint ideas for the living room most often center on a single feature wall — typically behind a sofa or fireplace. Warm neutrals and brown limewash tones work especially well here, adding visual warmth to larger, airier rooms. The natural variation in the lime wash texture also does something remarkable: it makes rooms feel larger, because the eye reads depth and texture as space.
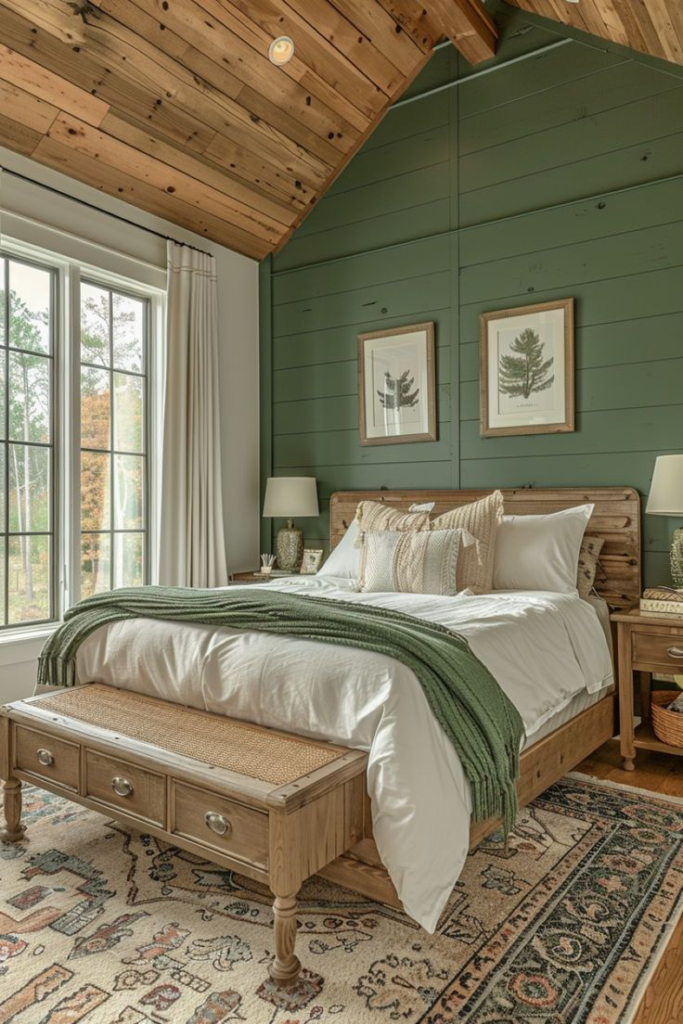
Bedroom: Calm, Soft, and Deeply Inviting
The bedroom is perhaps the ideal space for a full-room limewashing treatment. Soft whites, warm greys, and muted green limewash bedroom tones create a cocoon-like quality that feels deeply restful. Because the limewash painting technique produces such organic variation, it avoids the flat, builder-grade sterility that kills so many bedrooms. Even a crisp white limewash wall in a bedroom will have more visual life than standard wall paint.
Bathroom: Texture Meets Tranquility
A green limewash bathroom in sage or eucalyptus tones has a spa-like quality that feels expensive and serene. One important note: standard faux limewash is not inherently water-resistant. In bathroom applications — especially near the sink or shower — seal your finished walls with a flat or satin water-based polyurethane to protect the surface. This does slightly alter the limewash paint finish but preserves your work for years to come.
Exterior Walls: The Authentic Limestone Look
Traditional lime wash has been used on exterior walls for centuries. With the right product, you can achieve a stunning limestone paint effect on outdoor masonry, concrete, or brick. Exterior lime wash is breathable and actually helps regulate moisture in masonry walls — one reason it was so widely used in pre-modern construction. For exterior applications, always use a product specifically formulated for outdoor use and apply during mild, dry weather conditions.
Frequently Asked Questions About Limewash Paint
What does limewash look like when it dries?
Limewash dries to a matte, slightly chalky surface with gentle tonal variation across the wall. Unlike flat paint, which dries to a uniform, consistent color, a limewash wall shows soft patches of lighter and darker tone that create the illusion of aged plaster or stone. The color will dry significantly lighter than it appears when wet — often 30 to 50% lighter — so always let your test patch dry completely before judging the final effect.
Can you do limewash walls DIY as a total beginner?
Absolutely. DIY limewash walls are actually more forgiving than many other paint techniques because imperfection is part of the aesthetic. There is no need for perfect straight lines or uniform coverage — the whole beauty of limewashing is in the organic variation. Start with a small, low-stakes wall (a bathroom or hallway) to build confidence before tackling a large living room or bedroom space.
How do you make limewash paint at home?
To make limewash paint, mix one part flat white latex paint with one part clean water until smooth and creamy. Add universal tint if you want color. Stir thoroughly and test the consistency — it should feel thin but not watery. You can also use chalk paint as your base for extra texture. Remember: the lime wash recipe can be adjusted; use more water for a softer, more translucent layer, or less water for more coverage.
Is limewash paint suitable for drywall?
Yes, limewash on drywall works well when you prime the surface first with a flat white primer. Raw drywall is too porous for direct application and will absorb the mixture unevenly. A primer coat regulates absorption and gives the limewash paint something consistent to grip. After priming, allow to dry fully (at least 2 hours) before beginning your lime wash application.
What is the difference between limewash and whitewash?
While both create a similar aged, washed appearance, they differ in composition. Traditional lime wash uses hydrated lime as its base and creates a mineral-rich, breathable finish that actually hardens over time. Whitewash typically refers to a simpler mixture of white paint or chalk and water, applied more opaquely. The limewash technique tends to produce more depth, variation, and translucency than standard whitewash.
How many coats of limewash paint do you need?
For most walls, two to three coats of limewash are needed for a rich, layered result. The first coat establishes the base. The second coat adds depth and variation. A third coat — applied selectively — creates the most realistic, multi-dimensional effect. Allow each layer to dry fully (minimum 2–4 hours, ideally overnight) before applying the next.
Can you apply limewash paint over existing wall paint?
Yes — limewash over paint is entirely possible as long as the existing finish is flat or eggshell. Gloss and semi-gloss surfaces should be lightly sanded first. The lime wall paint mixture needs some texture and porosity to grip; a perfectly smooth, sealed gloss surface can cause the diluted paint to bead and run rather than absorbing properly.
How do you seal or protect limewash walls?
In low-traffic and low-moisture areas, limewashed walls can often be left unsealed. In kitchens, bathrooms, or hallways, apply a flat water-based polyurethane sealer to protect the limewash paint finish. Note that sealing will add a very slight sheen and may subtly deepen the color — always test on a hidden patch before sealing an entire room.
What brush should I use for limewash painting?
A wide, natural-bristle chip brush (4 to 6 inches wide) is the most effective tool for authentic-looking limewash painting. Synthetic bristle brushes can work but tend to leave more uniform strokes. Foam rollers should be avoided entirely — they produce a texture that is far too even for the limewash effect. For smaller detail areas (around trim and corners), a 2-inch chip brush works well.
How do you get green limewash paint right?
For a successful green limewash finish, start with a white latex base and add your green tint incrementally — mixing and testing as you go. Sage green, eucalyptus, and olive are the most popular choices for a lime wash green effect that reads as natural. A light green limewash effect is achieved by keeping the tint concentration low and building depth gradually through multiple layers.
Start Your Limewash Journey Today
There is a quiet confidence that comes from standing in a room you have transformed with your own hands. Faux limewash paint gives you access to one of the most beautiful, timeless wall finishes in interior design — without the specialist training, without the enormous budget, and without the anxiety of working with raw lime materials.
Whether you are drawn to the earthy warmth of a brown limewash dining room, the serene freshness of a green limewash bedroom, or the classic elegance of a soft white limewash wall in your living room, the technique is entirely within reach. Mix your paint, load your brush, and embrace the beautiful imperfection of it all.
Your walls have a story to tell — and limewash is the most eloquent way to let them tell it.
✦ GET YOUR FREE LIMEWASH COLOR GUIDE → yourdomain.com/faux-limewash-paint-guide ✦